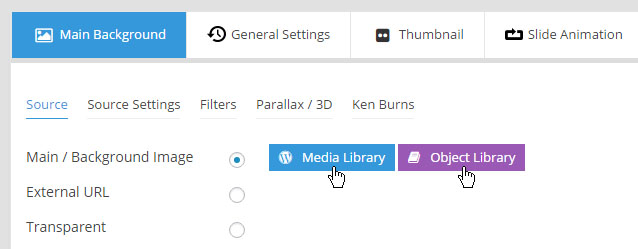
Slide’s main background
Set/Change Image
Upload or choose an image from your WP Media library, or use an image from the plugin’s Object Library.
SOURCE SETTINGS
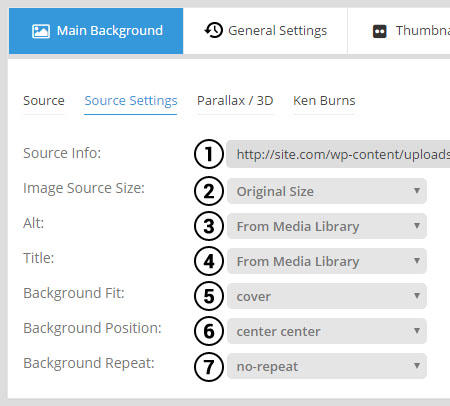
1. Source Info
The absolute url to the selected image (read-only).
2. Image Source Size
When you upload an image to a WordPress site, WP will automatically create multiple size versions of the image that can be used. And for your slide’s main background image, you can choose which of these versions you’d like to use.
Common options are “Original Size”, “Medium” and “Large”. A reasonably sized main background image for web is around 1600×900 pixels. If your original images are larger than this, you can choose “Large” or “Medium” here, and this will help to improve page loading performance.
From Media Library:
Value is taken from “WP Menu -> Media -> Library -> Select Image -> Alt Text”.
From Filename:
Alt text will be the same as the name of the file (i.e. “my-image.jpg”).
Custom:
Enter your own custom text to be used as the image’s Alt Text.
4. Title (useful for certain lightbox information)
From Media Library:
Value is taken from “WP Menu -> Media -> Library -> Select Image -> Title”.
From Filename:
Title attribute will be the same as the name of the file (i.e. “my-image.jpg”).
Custom:
Enter your own custom text to be used as the image’s Title attribute.
Contain:
Always fit the entire image inside the slider’s boundaries. Image cropping will never occur, but you may end up with blank space on the sides of the image (similar to a letterbox movie on an older television screen).
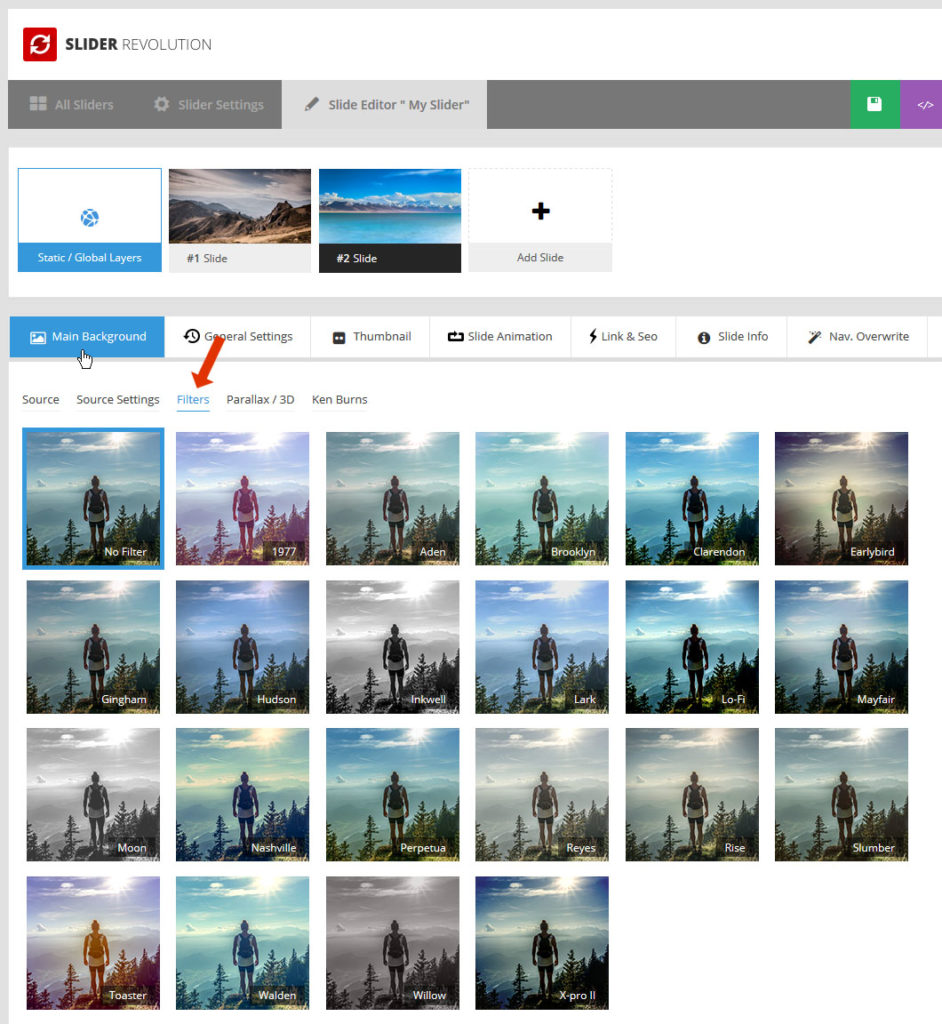
Filters
Add Instragram-type filters to your slide’s background image. Just select a filter and then view the slide’s editor canvas for a quick preview.
Parallax
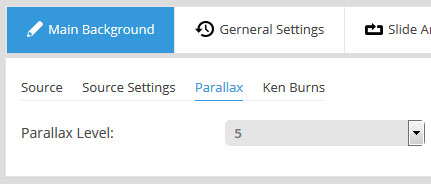
Parallax Level
To use this option, first make sure “Enable Parallax” is set to “ON” in the slider’s main parallax settings.
Adding a parallax level here will apply some movement to the main background based on mouse-move, scrolling, or both.
Check out the “Parallax Levels” part of the link above for help with choosing a “level” if you wish to use this option.
Ken Burns effect
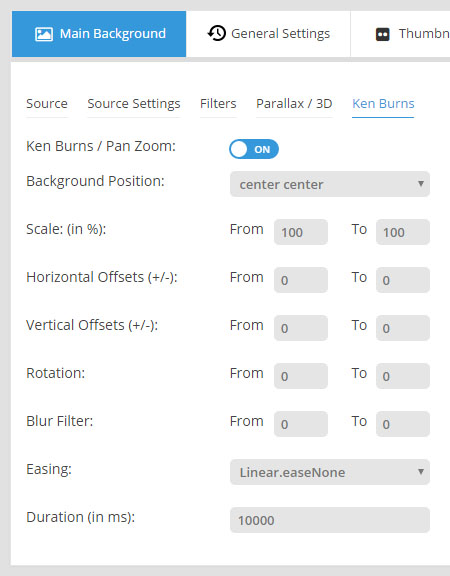
An elegant pan/zoom that will move and scale the main background image slowly after the slide comes into view.
Position the image inside the slider. Click here for more information about image positioning.
From: The starting scale percentage of the image
To: The ending scale percentage of the image
If you want your image to “zoom in”, set the “From” value to “100” and the “To” value to something larger than 100 (such as 150, which means the image would scale up by 50%).
If you want your image to “zoom out”, set the “From” value to something larger than 100, and then the “To” value to “100”.
These offset values are in relation to your main background image’s Background Position value.
For example, if your Background Position is “center center”, entering a Horizontal Offset of “100” would mean 100px to the right of the very center, which would then serve as the starting position of the Ken Burns effect. And a Horizontal Offset of “-100” would be 100px to the left of center.
Apply a starting and ending rotation for the effect. Smaller degrees such as 10-20 work best.
Blur the image as its animated. A number between 5-20 is recommended.
Easing
“Easing” is what gives a web animation that “real life” type of movement. For a traditional Ken Burns effect, “Linear.easeNone” is usually the best choice. But you can test the other options to see which one you like best.
The total time the Ken Burns effect will last, in milliseconds (1000 = 1 second). It’s usually best to set this to the same number used for the slide’s delay value (“Edit Slide -> General Settings -> Slide Delay”).